“Mini” Caprese Salad

Caprese Salad Ingredients

Caprese Salad Ingredients

Actually, this salad can be as big as you’d like. The only “mini” about it is the size of the ingredients in the bowl. Usually Caprese salads are nice big slices of tomatoes and  mozzarella alternating on the plate like a splayed deck of cards (ready for a fancy trick-pick a card, any card…um, queen of tomato?). But this one puts it all in a bowl in bite-sized pieces. You don’t need a knife to eat it (but a fork is useful).

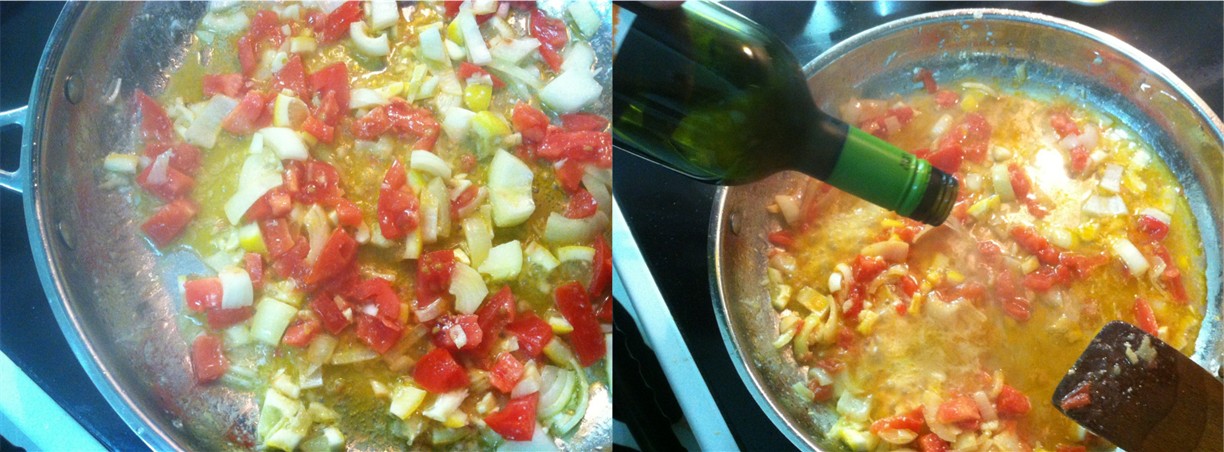
I’m combining the usual Caprese ingredients–tomatoes, mozzarella, basil–with a couple of other ingredients that used to satisfy my after-school snack desires: shallot & dried oregano. A fav dish of mine in that nowhere time zone of school-day-done-and-dinner was cut up tomatoes, diced yellow onion, dried oregano, olive oil and salt & pepper. I can still wolf down that concoction without blinking.

Of course, you know what “Caprese” means? Capri. As in the isle of Capri. Off the coast of Amalfi. One of those wowza places that sings siren songs in your head unexpectedly (like when you’re eating cheerios for breakfast or walking in a parking lot or doing the laundry–events that have nothing to do with the isle of Capri and so that’s its magic: it shows up anywhere).  I was just wandering that island last June. The streets were filled with tourists (doesn’t matter, it’s still phenomenal), the shops were dripping with everything you want to buy, the scenery takes your breath away so you have to stop to breathe every other step. On our approach to Marina Piccola by boat we slipped through the Faraglioni “rock islands” and felt like a visitor to another (beautiful) planet.

Capri

Faraglioni, Capri

So if you’re from Capri, you’re Caprese. Tomatoes grow in the south of Italy, mozzarella is made in Campania, which makes this salad “Caprese.”

Here’s how I turn it into “mini”…

Cut up the tomatoes into bite-sized pieces:

Cut tomatoes into bite-sized pieces

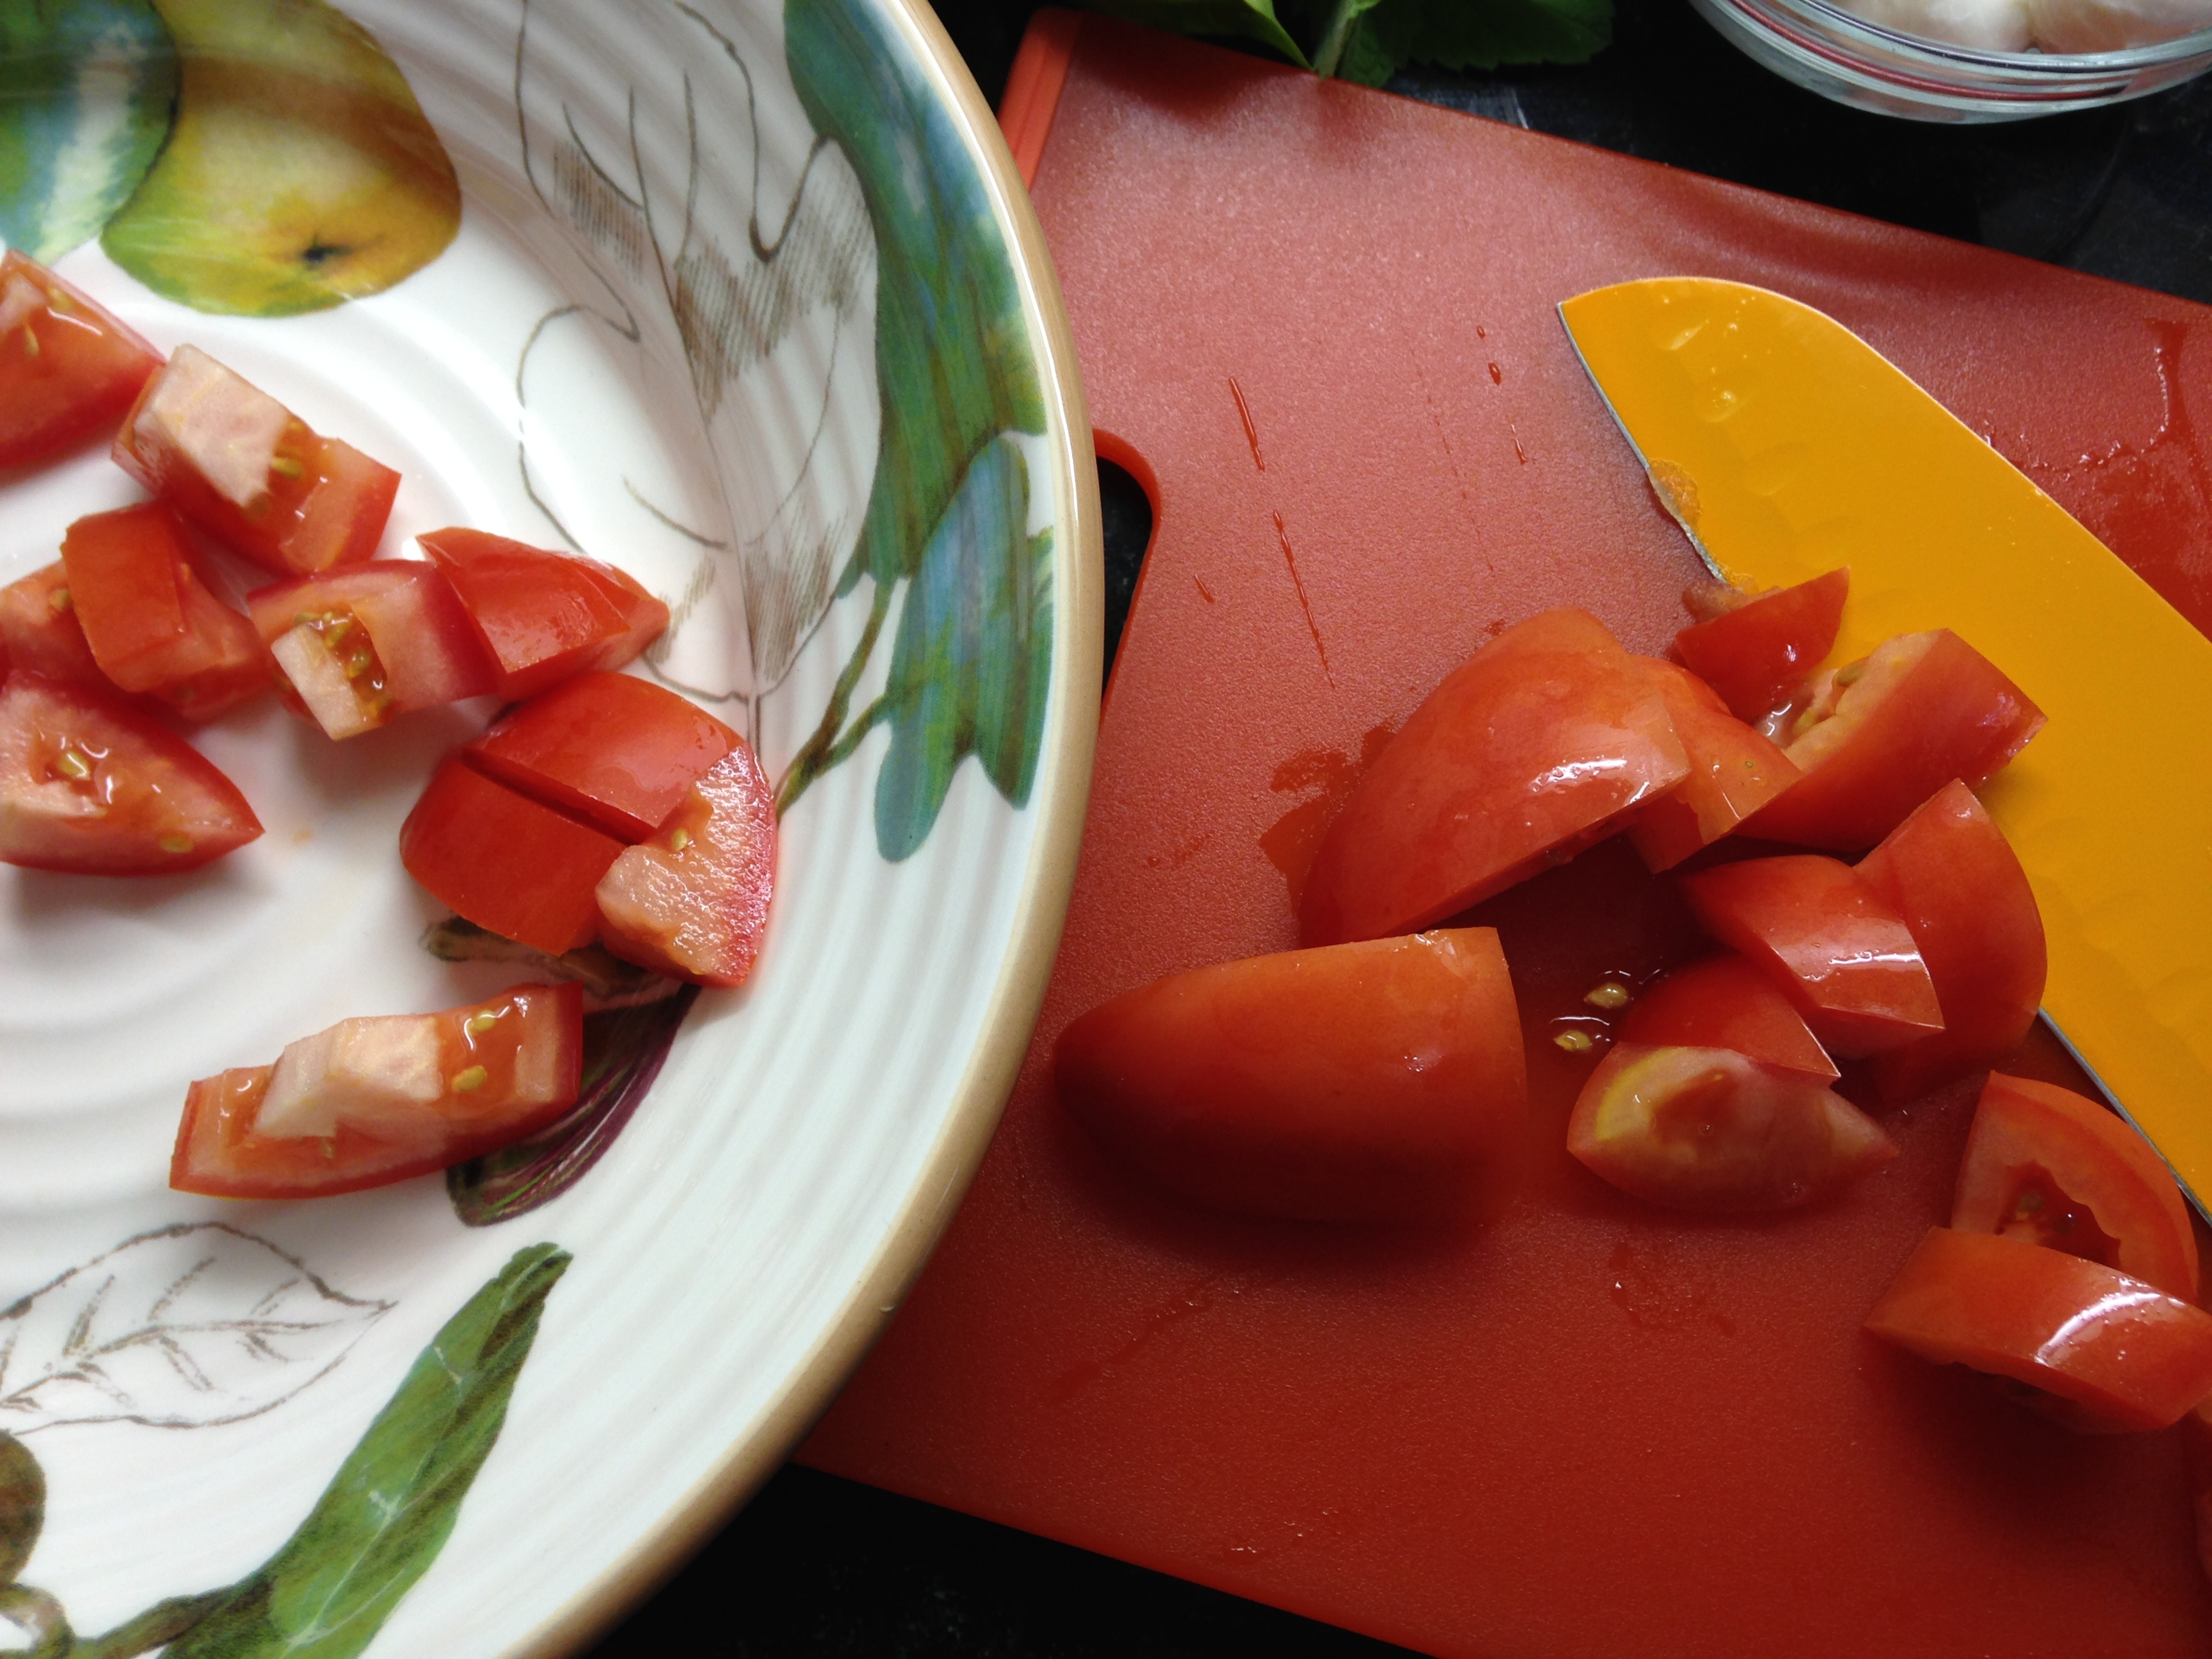
tomatoes in bite-sized pieces

Mince shallot (instead of my teenage-hood onion, much more subtle and gentle):

cutting shallot

cutting shallot

Use mini mozzarella balls (bocconcini)…and even these I cut in half:

cutting cheese

cutting cheese

Add fresh basil and/or fresh mint…I tear the leaves into bite-sized pieces:
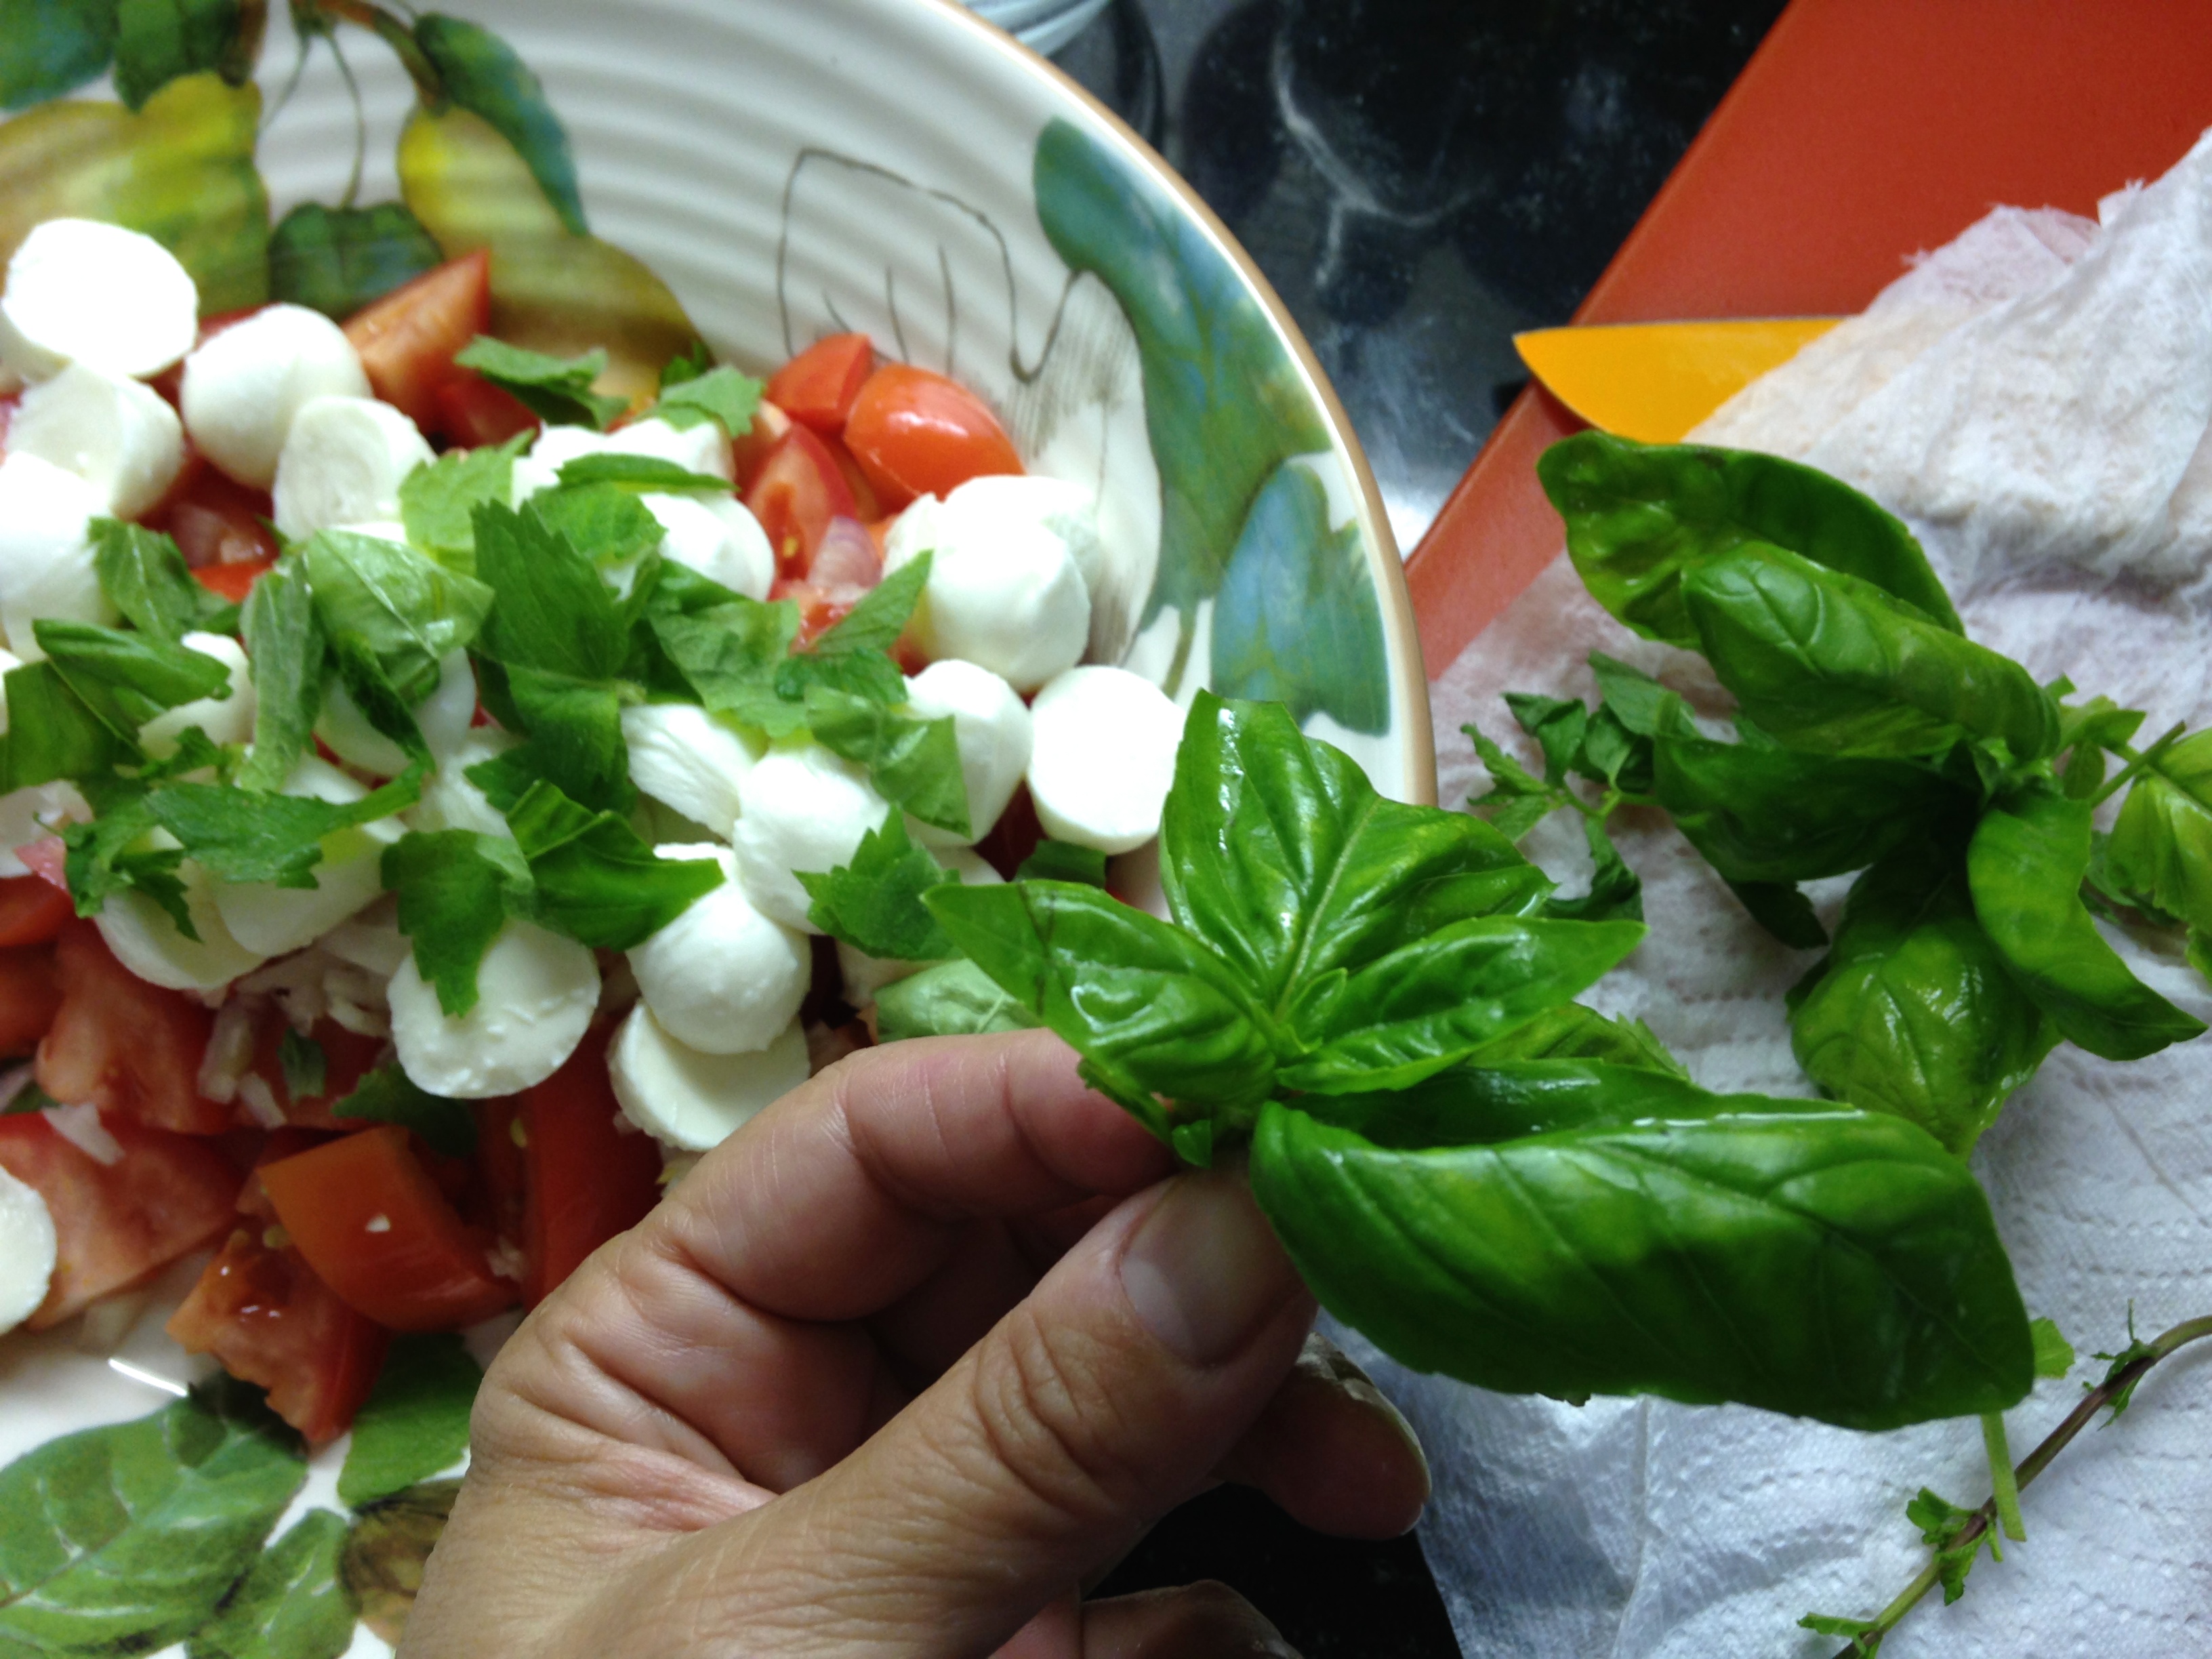
basil and mint

basil and mint

Dried oregano for that “after-school” zing:
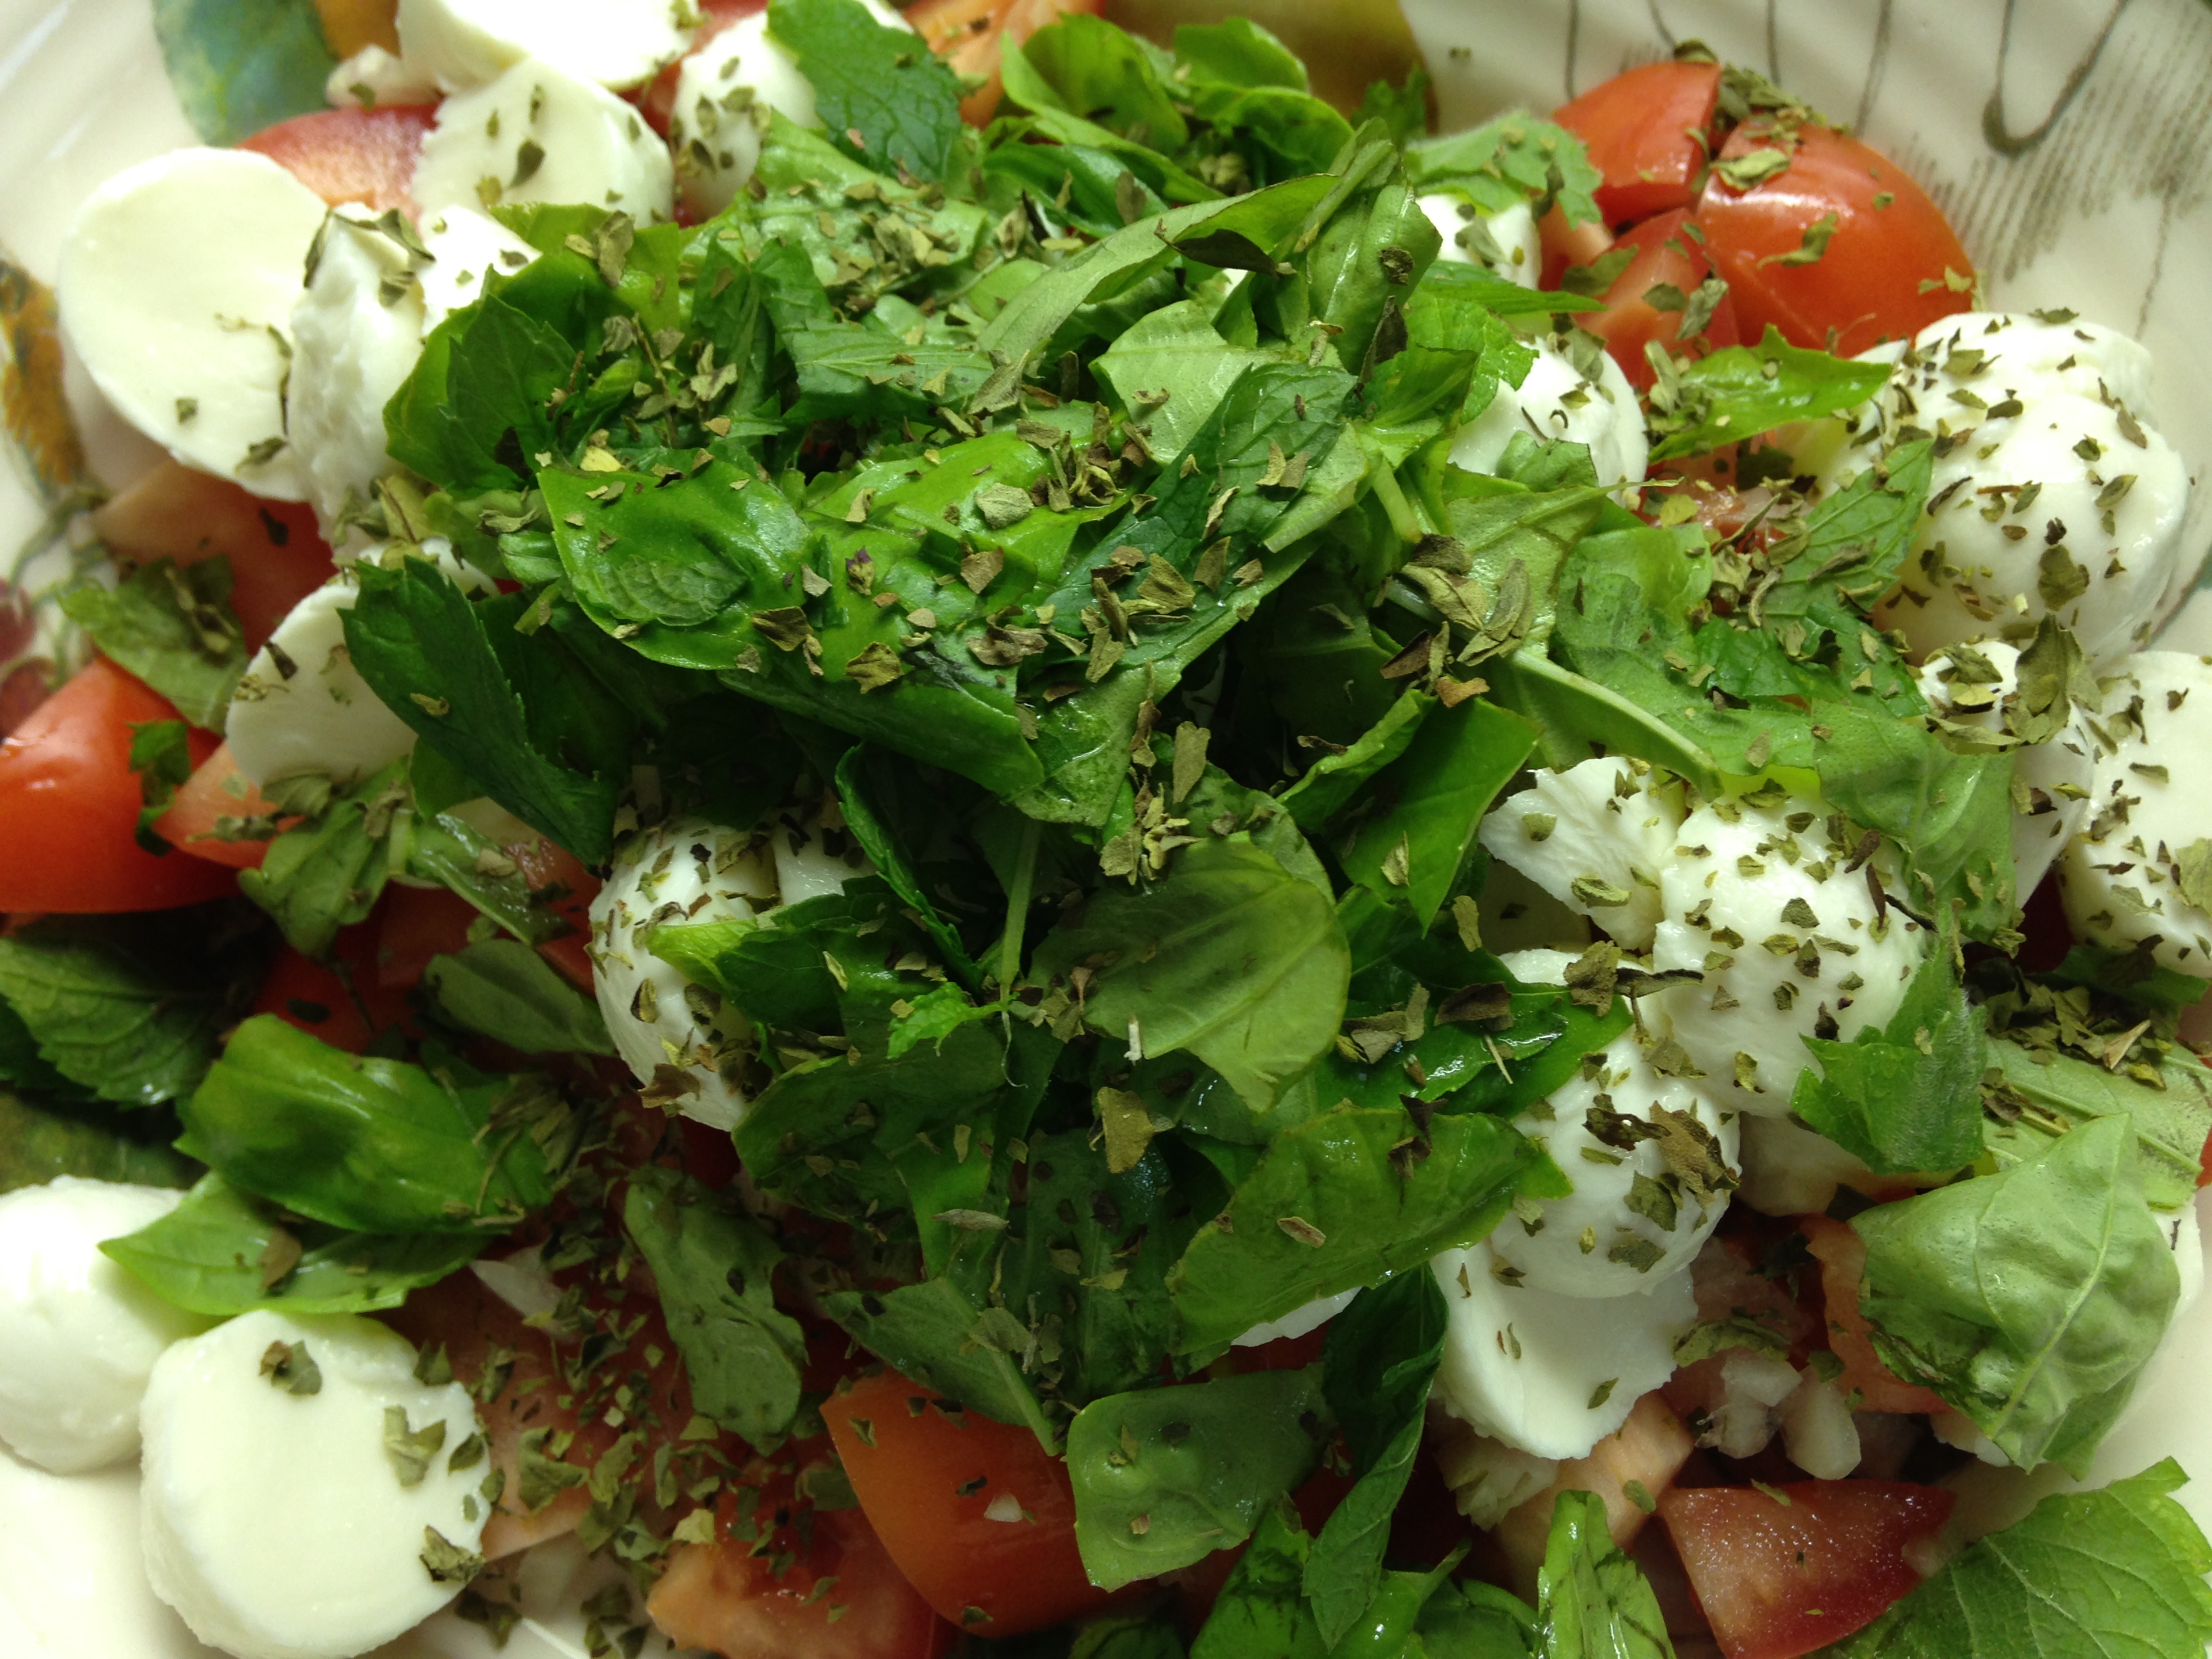
add dried oregano

add dried oregano

Drizzle of olive oil, salt & pepper and you’re in the land of yum…(just shy of the Tyrrhenian Sea by a few thousand miles but your taste buds just might be fooled).

mini Caprese Salad

mini Caprese Salad

Man, You Are One Cute Tomato!

Tomato-Herb Salad

Tomato-Herb Salad

I’ll bet that’s what you’ve been saying all summer every time you’re at the farmer’s market. Or even at the supermarket (I remember in NYC, at summertime, the supermarket would have piles of “Jersey Tomatoes”).

I palpitate, almost hyperventilate, when I see those red, pink, yellow beefy or delicate or misshapen tomatoes strewn over the market tables. And then the little pint baskets with mixed grape or cherry tomatoes in red, yellow & green. And the craggy, voluptuous heirloom tomatoes. Edible sculptures just begging for salt and teeth.

You can get dizzy-looney coming up with new ways/uses for the beauties. Of course the best is to just bite in and slurp. Go ahead. Nothing like it. But if you’d like to use a fork and/or knife this gentle salad is like building a pedestal for those queens and kings of summer (are tomatoes male or female– mmmm….??).

I cut up a variety of tomatoes into bite-sized pieces. Tear a bunch of fresh mixed herbs. (Try basil, tarragon, mint, parsley, fennel fronds.) Add a drizzle of olive. A drizzle of apple cider vinegar. Season lightly with salt & pepper (lightly because these tomatoes come equipped with giant flavor). Add some crumbled goat cheese on top. (Perhaps a handful of walnuts?) Toss gently. Take the whole serving bowl to your place at the table (preferably outdoors), (bring a fork). Pour a crispy cold little glass of white wine (I’ll take a New Zealand sauvignon blanc). And dive in…to summer in a bowl. To one of the best moments of your life (you’ll thank yourself one cold future winter day). It’s a celebration of you in summer untied with the willing friends of planet earth.

Tomato-Herb Salad

Tomato-Herb Salad

I Don’t Like Jam, But….

Crostata Marmellata

Crostata Marmellata

I’m the kind of eater who likes my peanut butter sandwich without jelly. Always have, always will.

I ignore the little jam package-cubes on the plate next to the butter package-cubes when toast arrives to the table at the diner. I have jars of jam in my refrigerator only because I teach cooking classes and sometimes I have to use them for a recipe. But if 2 ounces are left over from a 4-ounce recipe the jar will languish in the cold for months before I realize…hey, I’m never gonna use this, let’s throw it out.

Okay. One exception to the rule. And wouldn’t you know it’s the Italians who came up with it.

Crostata Marmellata. I make this recipe mainly because I love saying the name…it’s a poem in two words.

Well, I make it for other reasons, too. I happen to LOVE it. How can that be? The only ingredient in the filling is jam! I imagine that’s the magic of a great recipe. This one is a classic. I first learned from an Italian woman from Piacenza. She would make 3 tarts at a time because they’d get eaten up that fast. What works for me is the ratio of tart dough to jam filling in each bite. Gotta have that ratio. Add a little cup of espresso to your afternoon treat and you’ll feel like you’re hanging in the kitchen of a house in the hills of Rivergaro (of the Colli Piacentini) while the rosemary bushes sway in the breeze outside the door.

Crostata Marmellata – Jam Tart

For the pastry dough:

1 ½ cups flour

1 teaspoon sugar

pinch salt

½ cup unsalted butter (8 tablespoons), cut into cubes

¼ cup cold white wine

For the filling:

2 10-ounce jars of strawberry, blackberry, or raspberry jam

1 egg, lightly beaten, add tablespoon of water

Preheat oven to 375 degrees. Use a 9-inch tart pan.

Add the flour, sugar, salt to the bowl of a food processor, pulse to combine. Add butter and pulse until the mixture is crumbly with small pea-sized pieces. Add wine. Pulse until mixture comes together as a dough. Turn dough out onto a work surface and press together into a thick disc. Wrap in plastic and refrigerate for 30 minutes-1 hour.

Remove dough from refrigerator. Break off about one third of the dough and keep smaller piece covered in plastic. On a lightly floured surface roll out the larger piece of dough into a round disc about an inch or two larger than the tart pan. Place the dough into the pan and gently fit in into the corners. Trim the edges by pressing the rolling pin over the top.

Dock the pastry with a fork by pricking the bottom with the tips of the fork tines. Spread the jam evenly into the shell.

Now roll out the smaller piece of dough into about 1/8 inch thick. With a knife or pastry wheel cut strips of dough. Fit the strips of dough on top of the tart in a criss-cross design. Make sure to join the strips to the edges. Lightly brush dough with beaten egg wash.

Bake tart about 40 minutes until golden. Let sand for about an hour before serving.

Crostata Marmallata

Crostata Marmellata


The Zucchini, Peppers, Eggplant Reunion

Zucchini, Eggplant, Peppers

Zucchini, Eggplant, Peppers

You can use the above picture as a color palette for painting the walls of the rooms of your house. Bright yellow kitchen walls (I have that), Deep red dining room walls (I have that). Eggplant saturated office walls (I have that). And green…green…bedroom walls? (I don’t have that. No green walls.) (But the garden is green!)

Green Garden

Green Garden

The other thing you can do with that basket of wonder is cook it. Especially now when the shelves of the supermarket and the bins of the farmer’s market are spilling over with zucchini, eggplant and peppers. Those veggies just SAY summer (listen closely you can hear them) (they have tiny voices that squeak a little) (except for the eggplant, the eggplant is deep & bass-y). I’ve got a recipe that brings them together into a melange that makes them start singing.

First: cut each vegetable into uniform bite-sized pieces. Line 3 sheet pans with foil. Toss the cut-up zucchini on one, the cut-up peppers on the other, the cut-up eggplant on the third. Drizzle each with olive oil, sprinkle with salt & pepper (add a little hot pepper like “aleppo” if you’re so inclined), and roast each pan in a 400 degree oven until golden and softened.

NOW (in a large mixing or serving bowl) mix them all together. In a food processor (or by all means mince with a knife) pulse some basil and parsley and garlic. Add a little olive oil and season with salt. “Dress” your roasted veggies with the mixture and serve. Hot or room temp (I like room temp best for this).

When you take a bite you’re tasting summer, you’re swallowing the sun. You’re engaging with 3 separately grown vegetables that are finally having their reunion (because they are really lifelong friends…didn’t you know they went to high school together?)

Roasted zucchini, eggplant, pappers

Roasted zucchini, eggplant, peppers

And if you’re at the grill today and your CSA basket is overtaking your home with zucchini, eggplant and peppers, get them on the grill!

grilling zucchini, eggplant, peppers

grilling zucchini, eggplant, peppers

Slice each veggie. Toss with some olive oil and salt. Grill till grill lines make their appearance and your veggies soften up.

Make the pesto like above but add a bit more olive oil. Serve on a pretty plate (the veggies are, of course, the prettiest) and stare at the beauty for a while. But don’t wait too long. Your taste buds are dying to join the party.

grilled zucchini, eggplant, peppers w pesto

grilled zucchini, eggplant, peppers w pesto

My First How-To Video: Ricotta Gnocchi

And there’s more to come soon! Let me take you on a step-by-step guide to making these easy, light and luscious gnocchi.

Hmmm-mmm!

Sicilian-Style Roasted Chicken

Roasted Chicken Sicilian Style

Roasted Chicken Sicilian Style

We also called this chicken “Italian-style” when I was growing up (even tho everything was Italian-style…except for the occasional hot dogs and even Italians like hot dogs). To me it was “chicken with salad dressing.” Don’t get me wrong, I love this recipe, but the ingredients are salad dressing and that’s how I always remembered the recipe: olive oil, vinegar, oregano, garlic. And there you have it. That’s the recipe. But check out more details below.

My mom recently informed me that it’s not “Italian-style” chicken, but Sicilian-Style since she learned it from her mother-in-law and guess where her mother-in-law (my grandmother) was from? Yes, that’s right. Sicily. (Note: I added the lemon & parsley touch. Wherever I can get flavor and color I take it.)

This chicken is so tasty you’ll likely eat every piece in one sitting. But don’t. Probably not good for your waistline (or mine).

Sicilian-Style Chicken

1 chicken, cut up into 8-10 pieces

1/4 cup olive oil

1/4 cup apple cider vinegar or white vinegar or balsamic

2-3 garlic cloves, peeled and quartered

1-2 tablespoons dried oregano

Salt & pepper to taste

1 lemon, sliced into thin wedges

2-3 sprigs fresh Italian parsley, leaves minced, stems discarded

Preheat oven to 375 degrees F.

Season chicken pieces with salt & pepper. Place in a roasted pan. Drizzle olive oil, drizzle vinegar, sprinkle with garlic and oregano. Roast for 45minutes-1 hour until an instant read thermometer reads 165 in the thickest part of the thigh. Then turn on broiler and broil for about 2-3 minutes to golden.

Remove pieces to serving platter. Drizzle some of the juices. Sprinkle with parsley and lemon wedges. Serve.

I also demo’ed this recipe on WSMV-TV Channel 4 Nashville. Here’s the video segment:

Sicilian Chicken segment on WSMV-TV Channel 4 Nashville

Buon Appetito!

Red White & Blue 4th of July Tart

Red White & Blue Tart

Red White & Blue Tart

If you saw my spot on WSMV Channel 4 on July 4th you might have been looking for the full recipe for the 4th of July Tart (which is good any ole day!)…Here’s the recipe posted below. As I mentioned in the segment if you want to use a store-bought pie crust that works just as well. Just make sure you bake it till done before adding the cream and fruit.

Red, White & Blue Cream Cheese Vanilla Tart w 4th of July Berries

For the Crust:

1 1/4 cups flour

1 teaspoon sugar

pinch salt

6 tablespoons butter, cut into pieces

scant 1/4 cup cold white wine

For the Filling:

1 8-oz package cream cheese

1/4 cup sugar

Zest of one lemon

1/2 teaspoon vanilla extract

1 cup heavy cream

2 tablespoons powdered sugar

For the Fruit:

1 cup strawberries, trimmed & quartered

1 cup blueberries

1 cup raspberries

1/4 cup sugar

Preheat oven to 375 degrees F.

For the Crust: place the flour, sugar and salt in the bowl of a food processor. Pulse to combine well. Add the cut up cold butter and pulse till it’s broken up into smaller pieces. Add the wine and pulse until a dough forms. Place dough on a sheet of plastic wrap and press into a thick disc. Cover and refrigerate for at least 1 hour.

Roll out the dough on a lightly floured surface to about 1/8” thick. Fit the dough into a 9-inch tart pan with removable bottom. Lightly butter or Pam a piece of parchment a little bigger than the tart pan. Place the buttered surface down and fill with dry beans. “Blind” bake tart for about 10 minutes. Take out the beans, “dock” tart (poke with fork all over the bottom) and place back in the oven for another 8-10 minutes until golden. Let tart crust cool.

For the Filling: In a medium mixing bowl whisk the cream cheese, 1/4 cup sugar, lemon zest and vanilla until smooth and well combined. Add a few drops of milk if it feels too stiff. Beat the 1 cup of cream until stiff peaks form. Whip in powdered sugar. Fold cream into cream cheese mixture. Fill cooled tart shell with mixture and smooth top to even.

For the Fruit: Toss fruit with sugar. Place the fruit in a decorative pattern. Serve or chill for a little while before serving.

Enjoy!!

Me And Kacy Hagerty with the July 4th tart.

Me And Kacy Hagerty with the July 4th tart.

Make My Gnocchi RICOTTA

Ricotta Gnocchi w Chives

Ricotta Gnocchi w Chives

My first taste of gnocchi many years ago was potato gnocchi. Usually at a restaurant. And usually a bit heavy and a bit rich so I could never actually finish the dish. That was my idea of gnocchi.

A few years later (but still years ago) (before the Food Network and Cooking Channel) the Learning Channel had cooking shows. My favorite was Biba Caggiano’s. She’s from Bologna, married an American and moved with him to live in Sacramento, CA. She started teaching friends how to cook in the grand (but still home-made) Bolognese style.

Then she got a cooking show. And she’s written several cookbooks. And I began to follow her show and get all her books. I even got to meet her at an event in NYC and had my picture taken with her which hung in my NYC kitchen for many years. I also videotaped (from the TV on a VCR) almost all of her episodes. And re-watched them.

On day Biba made ricotta gnocchi. Not with potato. With ricotta. I watched her do it and it made perfect sense. I soon got the ingredients and went into my kitchen and made them, too, and they came out beautifully the very first time. She had easily and expertly passed on the skill through TV but I felt like it was also through some kind of cooking osmosis.

These ricotta gnocchi were not heavy at all. You could easily eat a large bowl of them dressed with a simple tomato sauce (I like a tomato sauce with a light touch of cream and added peas OR a pesto sauce with some string beans cut to bite-sized and boiled with the gnocchi).

Mind you, I have since learned potato gnocchi, too. And I’ve learned to make them very light. Yay! It’s just knowing what you’re doing. But guess what? IT’S EASY!!!

RICOTTA GNOCCHI (for 2-4 people depending how much you like to eat)

1 lb. ricotta

3/4 cup grated parmigiano

1 1/4 cups flour

salt & pepper to taste

Put the ricotta in a large mixing bowl. Add the grated cheese and 1 cup of the flour. Using a large spoon gently mix together the ingredients until they have smoothly combined. If it’s a little too sticky, add the remaining 1/4 of flour. Season with a health pinch of both salt & pepper. You can, if you like, add some chopped herbs, too. About a 1/4 cup: chives, basil, or tarragon…etc.

Pull a piece of dough off, about the size of a lemon. On a very lightly dusted surface, roll the dough gently into a log about 1/2-inch thick. Using a paring knife, cut from the log 1/2-inch pieces of dough.

gnocchi dough and log

gnocchi dough and log

That’s your gnocchi.

making ricotta gnocchi

making ricotta gnocchi

You can give each gnocchi piece some grooves by gently pressing each piece against a gnocchi board or gently across the back of a fork (the tines make grooves just as good!).

Finished Ricotta Gnocchi on sheet pan

Finished Ricotta Gnocchi on sheet pan

Toss your gnocchi with a little flour and place them, in a single layer, on a sheet pan dusted with a little flour. Until you’ve made them all. Boil them like pasta (they take just 2-3 minutes). Gently lift them from the water when done with a small colander or slotted spoon to a serving bowl. Add your chosen sauce and gently stir to coat the gnocchi. Eat right away. Gnocchi (like pasta) waits for no one!

(Once you’ve made the gnocchi and they are still on the sheet pan in one layer, you can freeze them like that. When they turn to little rocks, you can store them in a plastic bag in the freezer. To cook, don’t defrost. Just throw the frozen gnocchi in the boiling water. They will cook just as quickly as the fresh ones.)

Spaghetti. With Shrimp. In just a few minutes.

Shrimp Pasta

Shrimp Pasta

Okay, I used linguine. But you get the idea. When I was in my twenties in my first NY apartment (studio, 4 floor walk-up) I used to soothe myself from the barrage of NY (a barrage I loved) with sautéed shrimp and angel hair pasta mixed with butter. It sealed up the insanity and made me feel whole again.

That was a long time ago (yet very crystal clear).  But these days I don’t stray too far from that brand of comfort food. Still with the shrimp. Still with the pasta. But minus the butter (olive oil instead). And a couple of added goodies.

Here goes:

First off, I cut the shrimp in half lengthwise it makes a nice shape when cooked and gives you more shrimp to the mouthful. Figure about 1 pound of shrimp to almost a pound of pasta (two-thirds?).

Shrimp

Shrimp

Then I heat some olive oil in a large sauté pan. When hot I sauté the shrimp until opaque, then take them out.

Shrimp on pan

Shrimp in pan

Now add some diced onion and minced garlic to the pan. Let them cook and soften (add some more olive oil if needed). Then add diced up fresh tomato and diced up lemon — including the peel…gives you a nice surprise bite of lemon. Let that sauté till hot.

Onions, Garlic, Tomato, Lemon

Onions, Garlic, Tomato, Lemon

Add about a half-cup of dry white wine…

Add wine

Add wine

Let wine evaporate by half and let the mixture sauté nicely while you start boiling the pasta…

pasta water

pasta water

And making the breadcrumbs. I heat a little oil in a small sauté pan, add about a cup of panko crumbs, season with salt & pepper, and sauté until breadcrumbs brown to deep golden.

browning the breadcrumbs

browning the breadcrumbs

Add the shrimp back to the pan w the onion-garlic-tomato-lemon mixture just as the pasta is almost done. Drain pasta, reserve some cooking liquid, add pasta to pan with shrimp. Toss to coat and to let pasta absorb some of the tasty juices. Add some pasta water if too dry and another drizzle of olive oil. Season to your liking with salt & pepper and a little hot pepper. Add a good dusting of breadcrumbs.

Shrimp w Lingiune

Shrimp w Linguine

I promise you the cares of your day will melt away. This is especially fun eating quietly while watching a favorite, also comforting, TV show. Not the news. A comforting TV show. That makes you giggle. Or draws you into the story and characters. An old movie is perfect. Preferable something from the 1930’s or 40′ or 50’s or early 60’s.

See that? It can be easy to feel good.

Quail Eggs. Too delightful…too delicate not to like.


quail eggs

quail eggs

I’ve been a giddy bird watcher for years.

Actually I started watching birds in perhaps an unlikely place. Not the mountains, or the shoreline, or at lakes or in woodlands, but in NYC. You’d be surprised. Central Park–that huge piece of greenery in the middle of uptown separating the West from the East (or the East from the West deepening on which side of town you live)–held an oasis of a party during migrating seasons. In spring and fall an Audubon-like atrium popped up in Central park and us bird watchers were enthralled.

At the boathouse (where you can rent a row boat and paddle on the park’s friendly duck-filled lake) a large, thick book was stored. Birdwatchers would note what they’d seen that day in the park. When you first arrived you’d check the book to see what you might want to look for and where (the rambles, the reservoir, near the carousel). Best part was when you had a new species to add to the list.

I never saw quail there. They have other habitats to haunt. But I do see quail eggs often at the K & S markets in Nashville. And I do harvest them from the refrigerated counter to carry home.

In addition to bird guides that tell you the size, feathers, call, mating habits, nest-shapes of every bird species, are also bird-egg guides. So if you come upon a nest with blue speckled eggs you’ll know Robins are percolating there. Quail eggs would make the “Top Ten Beautiful Bird Eggs” list. Ecru, sepia, tan eggs with spots of black and brown and amoeba-like designs. Inside the hard shell is a tiny replica of the hen’s egg.

My favorite way to cook them is sunny-side up. You get a tiny sunny-side up egg that tastes delicate and light. A little salt. And that’s it. I think of them as garnish. My favorite place to place the garnish is on asparagus.

roasted asparagus with sunny side up quail eggs

roasted asparagus with sunny-side up quail eggs

First: Heat the oven to 400 degrees F. Line a sheet pan with foil. Lightly oil foil. Cut off woody ends of asparagus. Rinse under cool water. Lay them out on the sheet pan. Drizzle some olive oil. Season with salt & pepper. Roast until crisp-tender or your desired doneness. Just before serving sprinkle some grated parmigiano on top.

Meanwhile, get out a medium mixing bowl. If it has a lip for pouring all the better. But if not, no prob. Gently break each quail egg and gently drop the egg into the bowl. The pack I get at K & S has 10 eggs. Use them all. Now, I say “gently break” but it’s a combination of gently and earnestly. Quail egg shells tend to be harder than hen egg shells. Sometimes I even use a serrated knife to get the cut going then break the shell.

Heat a little olive oil in a large sauté pan. Then gently pour each egg yolk into the pan (it will naturally be accompanied by some egg white). You’ll see the little perfect sunny-side up eggs form quickly. Sprinkle with salt and spatula them out to top the asparagus. Hmmm-mmm!